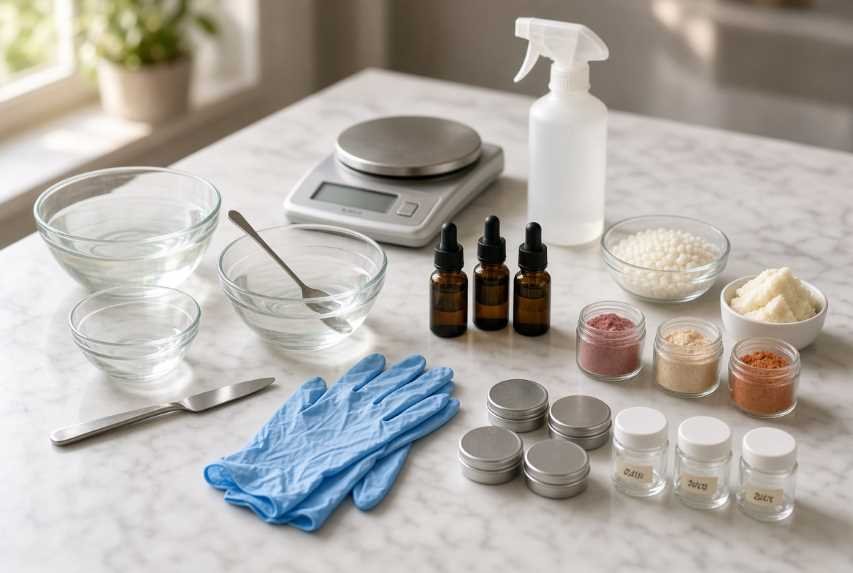
Making makeup at home has moved from a niche craft to a popular experiment for people who want more control over color, texture, and ingredients. Some want a custom lip tint that matches a favorite outfit. Others want to understand what actually sits in a blush pan or a highlighter. Cost savings can be real once a few staple ingredients are on the shelf. So is creative play: mixing a small batch is closer to cooking or watercolor painting than to factory production. Ingredient awareness is another draw. When you melt wax, stir in a measured pinch of pigment, and pour it into a tin, you can see every component. There is no mysterious twelve-line label standing between you and the formula.
Those benefits come with limits that matter more than the internet usually admits. Homemade cosmetics are not the same as professionally formulated products. A kitchen is not a cosmetics laboratory. Commercial makeup is designed around stability, preservation, shade consistency, packaging that limits contamination, and manufacturing conditions meant to keep microbes and debris out of the batch. A homemade product is a small personal experiment. It can be enjoyable and useful if you treat hygiene, measurements, and ingredient selection as non-negotiable. It can also irritate skin, contaminate easily, stain clothing, or become unsafe if you improvise with craft supplies, food dyes, kitchen spices, or water-based formulas that have no real preservative system.
This guide is written for beginners who want simple, relatively low-risk projects. It focuses on anhydrous products—formulas based on oils, butters, and waxes rather than water—because those are easier to manage at home. It also explains where DIY should stop, especially around the eyes and with products that contain water. The goal is not to turn a bathroom counter into a brand. The goal is to help a careful beginner make a few honest products, understand why they behave the way they do, and recognize the difference between a successful tinted balm and a formula that should never have left a recipe blog.
Important safety note: Natural does not mean safe. Plant powders, kitchen spices, essential oils, lemon juice, and mineral-looking craft pigments can irritate skin, stain, or contain impurities that were never assessed for use on lips or around the eyes. Use only ingredients sold for cosmetic use. Follow the intended-use restrictions on the label—lips, face, or eyes are not interchangeable categories. Patch-test every new formula. Discard anything that looks, smells, or feels off. If a recipe requires guesswork around preservation or tells you to use a crayon, a craft glitter shaker, or “whatever is in the spice rack,” skip it.
Essential Safety Rules
Read this section before mixing anything. Most homemade-makeup problems do not come from a lack of creativity. They come from wet jars, dirty spatulas, the wrong pigment, and the belief that a product is safe because it was made with familiar kitchen ingredients.
Sanitize the workspace, tools, and containers
Choose one clear, uncluttered surface. Food crumbs, pet hair, and damp dishcloths do not belong next to open jars of pigment. Wash the work surface with hot, soapy water, rinse, and dry. Then wipe it with 70% isopropyl alcohol and let it air-dry. Alcohol works best on a surface that is already clean. It is a sanitizing step, not a substitute for washing off grease and debris.
Wash bowls, spoons, spatulas, and containers the same way. Glass and heat-safe stainless steel are easier to clean than scratched plastic, which can harbor residue in grooves. New cosmetic jars and lip balm tubes are better than reused food jars unless those jars can be thoroughly washed, sanitized, and completely dried. A jar that still smells like sauce, or a lid with trapped moisture in the thread, is a poor container for anything you plan to put on your mouth or face.
If you use a double boiler, wash that equipment too. Do not melt cosmetic ingredients in a pan that still has last night’s dinner film on it.
Keep hands and tools clean
Wash and dry your hands thoroughly before you start. Disposable gloves reduce the chance of transferring bacteria from skin into a balm or powder and also keep strong pigments from staining your nails. Do not dip used fingers into a finished pot after you have already applied the product to your face. A clean spatula, a disposable applicator, or a small dedicated scoop is safer than repeated finger dipping.
Tie back hair. Keep phones off the mixing bowl. Avoid talking directly over open powders if you can; saliva droplets are not an ingredient.
Prefer cosmetic-grade ingredients
“Cosmetic-grade” means the ingredient is intended for use on skin or, when specified, around the eyes or on lips. That label is not a magic word, and suppliers vary in quality, but it is still the correct starting filter. Craft mica, candle dye, soap colorant, artist pigment, printer ink, children’s glitter, and eyeshadow scraped from an old drugstore compact of unknown origin are not interchangeable with cosmetic colorants bought for a stated use.
Some craft pigments can contain heavy metals, binders, or particle sizes that are not appropriate for facial use. Some food-safe colors are acceptable in a cookie and still a bad idea on an eyelid. Buy from suppliers that clearly state cosmetic use and the approved application area. If a listing says “for soap and crafts” and never mentions lips or eyes, do not upgrade it with optimism.
Perform a patch test
A patch test is a pause button, not a guarantee. Apply a small amount of the finished product to a discreet area such as the inner forearm or behind the ear. Leave it in place for 24 to 48 hours. For leave-on face products, a more cautious approach is to test a small area twice daily for several days. Do not use the product on the face or lips if the test area becomes red, itchy, swollen, tight, or blistered.
A passing patch test does not mean you will never react later. Allergies can appear after repeated exposure. It does catch many obvious irritants before they reach the mouth, eye contour, or a large area of facial skin. If you have a history of contact dermatitis, eczema, or fragrance allergy, keep the first formulas unscented and extremely simple.
Keep certain ingredients away from eyes and damaged skin
Do not put homemade products into the eye, on the waterline, or on broken, inflamed, sunburned, or freshly exfoliated skin. Avoid essential oils near the eyes. Avoid food coloring, kitchen spices, lemon juice, baking soda, and unknown powders on the face. The eye area is especially vulnerable. Analyses of published DIY recipes for periocular products have found imprecise quantities, ingredients that are not suitable for that use, and preservation that is not good enough for a product that sits near mucous membranes.
If a product stings, rinse it off with lukewarm water and stop. Do not “push through” a burning sensation because a recipe promised a natural glow.
Understand water, microbes, and preservatives
Water, floral water, hydrosols, aloe juice, leftover gel, and wet fingers introduced into a jar create conditions where bacteria, yeast, and mold can grow. An antioxidant such as vitamin E can slow oils from going rancid. It is not a broad-spectrum preservative. Honey, vinegar, grapefruit-seed extracts sold with miracle claims, and refrigeration are not reliable substitutes for a preservative system designed for cosmetics.
If a formula contains water or will regularly contact wet hands, it needs an appropriate cosmetic preservative used at the supplier’s recommended rate, in a compatible pH range, plus packaging that limits contamination. That is formulation work. Beginners should avoid water-based makeup rather than guess. A lip balm made of wax and oil is a different microbiological situation from a cream that contains water and is scooped daily in a warm bathroom.
Label everything
Write the product name, full ingredient list, and preparation date on every container. If you later react to a batch, the label tells you what was in it. Memory is a poor inventory system, especially when two tins of pink balm look identical. If you adjust a recipe, note the change. “A little more mica than last time” is not a useful record.
Store carefully and discard at the first warning sign
Keep products cool, dry, and away from direct sunlight and bathroom steam when possible. Tight-fitting lids help. Do not store lip balm in a hot car. Do not leave a powder compact open beside the shower.
Discard a product if it changes smell, color, or texture; if it separates in an unusual way and will not remix; if it grows visible spots; if it stings; if the surface looks filmy; or if you cannot remember when you made it. Do not assume a homemade product is safe for months because it still “looks fine.” Appearance is only one clue.
Basic Equipment
You do not need a laboratory, but a few dedicated tools make batches more consistent and cleaner. Dedicated matters. A spatula that also stirs pasta sauce will eventually share more than enthusiasm.
Small mixing bowls: Glass or stainless-steel bowls hold melted oils and powders without staining as easily as some plastics. Several small bowls are better than one large one when you are blending trial shades.
Measuring spoons: Useful for tiny amounts of pigment when you do not yet have micro scoops, though a scale is more accurate for waxes and butters.
Digital kitchen scale: The most important tool after sanitation. Weighing in grams is more reliable than volume. A tablespoon of packed beeswax is not the same as a tablespoon of fluffy mica.
Spatulas: Silicone or stainless spatulas scrape bowls clean and reduce waste. Mini spatulas help with tiny jars.
Small cosmetic containers: Lip balm tubes, tins, jars, and pans keep products covered and portable. Buy more lids than you think you need; a missing lid is how a balm collects dust.
Dropper bottles: Helpful for oils and for adding tiny amounts of liquid ingredients without pouring from a large bottle.
Small jars: Best for balms, cream blush, and body shimmer. Choose containers you can actually sanitize, including the threads of the lid.
Disposable gloves: Reduce contamination and keep pigment off skin and nails.
Labels and a marker: Record ingredients and the date immediately, before the batch looks obvious and you tell yourself you will remember.
Sanitizing materials: Dish soap, hot water, clean paper towels or a clean cloth reserved for this work, and 70% isopropyl alcohol.
Optional but useful: A small whisk or mini mixer for powders, a funnel for tubes, parchment or a silicone mat to protect the counter from dye stains, and a simple dust mask when you mix fine powders.
A dust mask is wise when you blend mica, clay, or iron oxides. Inhaling loose pigment is unnecessary and unpleasant. Keep children and pets away from the work area. Pigments stain. Hot wax burns. Small parts from tubes and lids are not toys.
Work in good light. Color that looks perfect under a yellow kitchen bulb can look surprisingly loud in daylight.
DIY Makeup Products
Start with small batches. One or two lip balms or a single small jar of blush is enough to learn texture and color. The methods below are educational starting points, not commercially tested formulas. They assume cosmetic-grade ingredients, clean dry equipment, and a willingness to throw a batch away if it fails.
Adjust only after you understand how the base behaves. If a balm is too soft, the next batch needs a little more wax, not a random extra spoon of butter “to see what happens” on top of an already soft stick.
Tinted Lip Balm
A tinted balm is one of the most beginner-friendly projects because it is anhydrous: oils, butter, and wax with no added water. It teaches melting, pouring, pigment dispersion, and the relationship between wax and softness.
Suitable ingredients
Beeswax, to firm the balm so it does not melt too quickly in a pocket or a warm room
Shea butter or cocoa butter, for cushion and glide
A liquid oil such as jojoba, castor, or fractionated coconut oil
Cosmetic-grade mica or lip-approved cosmetic pigment
Optional vitamin E as an antioxidant for the oils
Use only colorants labeled as suitable for lips. Do not use craft glitter, candle dye, eyeshadow of unknown origin, or random food coloring as a shortcut. Castor oil adds gloss and cling. Jojoba stays relatively light. Cocoa butter makes a firmer, more scented balm. Shea is softer and creamier.
Basic method
Sanitize tools and containers and let them dry completely. Moisture in a tube can create pockets in the poured balm and is poor practice even in an oil formula.
Weigh a simple ratio such as 1 part beeswax, 1 part butter, and 2 parts oil. A 10–15 gram total batch is plenty for two or three small tubes.
Melt the wax and butter gently over a double boiler or in short, low-heat bursts, stirring until smooth. Do not scorch the mixture. Burnt butter smells like failure and can discolor the batch.
Remove from heat. Stir in any remaining oil, then add a small amount of lip-safe mica or pigment.
Mix until the color is even. If you still see specks, keep stirring. Some pigments wet out slowly in oil.
Pour into tubes or tins while the mixture is still fluid. Fill slowly so you do not trap large air bubbles.
Let it set undisturbed, cap, and label.
If the balm sinks in the center as it cools, that is common. You can leave it or warm a tiny leftover amount and top it off once. Do not keep reheating the same batch over and over; repeated high heat is hard on oils.
How to achieve different shades Start with less pigment than you think you need. A tiny amount of red or pink iron oxide or a lip-safe rose mica creates a sheer stain. More pigment increases opacity. Mixing a warm gold-pink mica with a cooler berry tone can shift the result from peach to rose. A speck of brown oxide can take the neon edge off a pink that looks too doll-like on your skin.
Test a cooled drop on the back of a clean hand, then on lips after it sets. Warm lip balm looks darker in the bowl than it will look as a sheer smear.
Storage recommendations Keep the balm closed, cool, and dry. Because there is no water in the formula, microbial growth is less likely than in a lotion, but oils can still oxidize. If the balm smells like old crayons, stale nuts, or leftover frying oil, discard it. If it has been sitting open in a gym bag, consider that a short life.
Lip Scrub
A lip scrub is a simple mix of an oil or butter with a fine, food-safe granular ingredient such as sugar. It is not a daily treatment and it is not a way to sand off dry skin at all costs.
Basic ingredients
Fine sugar, which is less scratchy than coarse crystals
A small amount of jojoba, coconut, or castor oil
Optional cosmetic-grade lip-safe color
Optional honey for tack, used sparingly and with the understanding that a wetter jar should be finished quickly
Preparation Combine sugar with just enough oil to create a damp, scoopable paste. Too much oil makes a slippery puddle. Too little sugar paste feels harsh. Mix in a sanitized jar and label it.
How to use it safely Apply a small amount to lips with clean fingers, massage very gently for a few seconds, then wipe or rinse and follow with balm. The point is mild smoothing, not abrasion. Do not use a lip scrub on cracked, bleeding, sunburned, or freshly irritated lips. Do not use facial scrubs with large, jagged salt crystals on the mouth.
How often it should be used Occasionally is enough. Once or twice a week is a reasonable ceiling for many people. Daily scrubbing can worsen dryness by damaging the thin skin of the lips. Afterward, a plain balm does more good than another round of sugar.
Because wet fingers go into the jar, make a small amount and finish it promptly. Do not add water to “loosen” a scrub that has dried out.
Cream or Powder Blush
Blush can be made as a cream, which is easier for many beginners, or as a loose or loosely pressed powder. Cream blush behaves like a tinted balm. Powder blush behaves like a soft pigmented dust and requires more care around inhalation and fallout.
Cream blush ingredients
A small amount of shea butter or a simple balm base
A lightweight oil such as jojoba
Cosmetic-grade pigment or mica intended for face use
Optional kaolin for a slightly more matte feel
Equipment A scale, a small heat-safe bowl, a spatula, a sanitized jar, and gloves. A clean brush or sponge for application later should not be the same tool you mix with.
Measurements Use a scale if possible. A 10 gram batch might use most of its weight as butter and oil, with pigment added in tenths of a gram until the color looks right on the back of a clean hand. Write the amounts down. “Pink enough” is not reproducible.
Preparation steps for cream blush
Melt the butter gently, stir in oil, and remove from heat.
Add pigment a little at a time and mix until no streaks remain.
If you want less shine, sprinkle in a small amount of cosmetic kaolin and mix again.
Pour into a small jar, cool fully, and label.
If the cream sets too hard, the next batch needs a touch more oil. If it slumps in summer heat, it needs a little more wax or a cooler storage spot.
Powder blush A beginner powder can combine a base such as cosmetic kaolin or a commercial mineral makeup base with face-approved iron oxides or micas. Mix thoroughly. Uneven pigment creates stripes on the cheek. A small coffee-grinder-style mill dedicated only to cosmetics can help, but it also creates dust. Wear a mask and wash the mill so colors do not contaminate the next batch.
Apply with a clean brush and tap off excess. Do not blow on the pan. Do not inhale the powder while mixing.
Color customization More red or pink oxide increases warmth and intensity. A touch of brown oxide can mute a color that looks too loud. A little gold or champagne mica adds sheen for a satin cheek. Cool pinks can look ashy on warm skin; warm peaches can look muddy on cool skin. Always test on the jawline in daylight. Bathroom lighting flatters almost everything and then betrays you outdoors.
Simple Eyeshadow
Eye-area products deserve extra caution. Only use pigments and micas explicitly intended for cosmetic use on the eye area. Do not use food coloring, craft glitter, soap mica, or a pigment whose label is silent about eye use. If you wear contact lenses, have sensitive eyes, or get styes easily, commercially tested eyeshadow is the more responsible choice.
A simple loose eyeshadow can be a blend of eye-approved mica and a small amount of a suitable powder base such as sericite mica or a cosmetic mineral base. Mix in a small, dry container with a sanitized spatula. Work slowly so fine dust stays in the bowl instead of becoming a cloud.
Safe pigment selection Look for language that says the colorant is intended for eyes or for all cosmetic use including eyes. “Pretty gold powder for crafts” is not that language. Iron oxides and many micas can be suitable when they are the correct grade. Random metallics and large-chunk glitter are not.
Mixing process Add base first, then color, then mix. If you want two shades, make them in separate bowls. Cross-contaminated brights are hard to undo. Check the texture between fingers. It should feel fine, not sandy. Grit near the eye is both uncomfortable and a reason to stop.
Pressing powder safely Pressed powder is more convenient but more technical. Commercial pressing often uses a binder and even pressure. At home, some people add a drop or two of a suitable cosmetic binder or a very small amount of oil to a pan and press firmly with a clean coin wrapped in plastic. Too much oil makes a greasy, uneven cake that harbors debris. Too little pressure makes a pan that explodes into loose powder on first touch.
If the powder crumbles, looks wet, or feels gritty, do not use it near the eyes. Store tightly closed. Keep brushes clean and dry. If the product ever gets wet—splashed, used with a wet brush that was not fully dried, dropped in a sink—discard it.
Highlighter
A powder highlighter is usually a pale, reflective mica blended into a soft powder base. The skill is restraint. Too much pure shimmer looks like craft glitter sitting on the cheekbone. Too little looks like ordinary powder.
Use cosmetic-grade highlighter micas in champagne, pearl, soft gold, or rose. Mix a small amount of shimmer with a base such as kaolin or a mineral makeup base so the product is not only reflective flakes. More mica increases shine. More base increases a skin-like, diffused glow.
Apply with a clean brush to the high points of the face—upper cheek, a touch on the brow bone if the pigment is eye-approved, a little on the cupid’s bow if the pigment is lip-and-face approved. Keep non-eye-approved shimmer off the lids.
A cream highlighter can be a tiny amount of the same mica stirred into a simple balm base. Use less shimmer than you think you need. On skin, concentrated mica can look sparkly rather than luminous, especially in office lighting or flash photography. If your skin is very textured, a finer, more diffused highlighter is usually more flattering than a chunky sparkle.
Body Shimmer
Body shimmer is an oil or light balm with cosmetic-grade shimmer mixed in. It is for intact body skin, not the eye area and not inhalation.
A simple version is a small bottle of jojoba or fractionated coconut oil with a measured pinch of body-safe cosmetic mica. Shake before each use because mica settles. Apply with hands, not by creating a dusty cloud over the chest. Avoid the face unless the mica is labeled for facial use. Wipe the bottle rim so powder does not cake around the cap and then flake onto clothes.
Do not use craft glitter. Plastic craft glitter can have sharp or irregular particles and is not designed to sit in skin folds, under jewelry, or in a summer heat that also includes sunscreen and sweat. Keep body shimmer away from broken skin and away from the eye contour when you apply it to shoulders or décolletage.
If you make a solid shimmer balm instead of an oil, use a small jar and a clean scoop. Wet beach hands should not go into the jar.
Simple Foundation or Tinted Face Product
Foundation is where many DIY attempts become disappointing or unsafe. Matching undertone, depth, oxidation, and wear is difficult even for professionals with full pigment libraries. Liquid and cream foundations that contain water need emulsifiers, a controlled process, pH attention, and a working preservative system. Those are formulation skills, not kitchen improvisation.
There is an important difference between anhydrous and water-based face products. An anhydrous tinted balm is mostly oils, butters, waxes, and pigment. It can sit on dry patches and add a hint of color. A water-based foundation is an environment in which microbes can multiply if preservation fails. Adding water, aloe gel, toner, or leftover moisturizer to “thin” a homemade tint changes the product into something that needs real preservation.
A cautious beginner option is an anhydrous tinted balm or stick: a small amount of face-approved iron oxides mixed into a simple oil-and-wax base. Mix oxides thoroughly or the face will show specks. Test on the jaw in daylight. Expect limited coverage. Expect shine. Expect the shade to look different after an hour if the oils sink in.
Do not treat this as sunscreen, acne treatment, or a replacement for a well-matched commercial foundation. If you want reliable coverage, a broad shade range, and a product that must live in a humid bathroom for months, a tested commercial product is the better tool.
Ingredient Guide
The same ingredient can be helpful in one formula and frustrating in another. Amounts, skin type, climate, and the rest of the recipe all matter.
Ingredient | Purpose | Typical use in homemade makeup | Safety considerations |
Beeswax | Thickens and raises melting point | Lip balm, cream blush, sticks | Heat gently; some people are sensitive to bee products; too much wax makes a stiff, draggy stick |
Shea butter | Softens and adds cushion | Balms, cream color products | Can feel heavy on oily skin; unrefined shea has a stronger scent |
Cocoa butter | Firm, richer texture | Lip balm, body products | Distinct scent; can feel waxy if overused; melts in heat |
Jojoba oil | Lightweight emollient | Balms, cream blush, body shimmer | Generally well tolerated; still patch-test; does not preserve the formula |
Coconut oil | Emollient that is easy to melt | Balms and scrubs | Can feel greasy; solid coconut oil liquefies in warm weather; some faces dislike it |
Castor oil | Gloss and cling | Lip balm and gloss-style balms | Thick and sticky if used alone; better as part of a blend |
Cosmetic-grade mica | Color and shimmer | Lip tint, blush, highlighter, eyeshadow if eye-approved | Must be cosmetic-grade and approved for the area of use; avoid inhaling loose powder |
Cosmetic pigments such as iron oxides | True color and coverage | Blush, tinted balm, experimental tinted face products | Use only cosmetic pigments; mix thoroughly to avoid speckling |
Kaolin clay | Soft powder base and some oil absorption | Powder blush and highlighter bases | Use cosmetic clay; keep it dry; do not inhale clouds of it |
Vitamin E | Antioxidant for oils | Oil-based balms | Slows rancidity; does not replace a preservative in water-containing products |
Other materials sometimes appear in beginner kits. Arrowroot or cornstarch show up as powder fillers; they are not automatically superior, can feel pasty, and are not a reason to skip cosmetic pigment rules. Magnesium stearate appears in some mineral bases to improve slip; it is a cosmetic ingredient, not a pantry item to invent at home. Essential oils appear in far too many recipes relative to their usefulness in makeup.
Ingredients to Avoid
Beginners should leave these out of homemade makeup, even when a social-media recipe presents them as clever hacks.
Craft pigments and art supplies. They are not assessed for use on lips or around eyes. A beautiful jar in a craft aisle is still a craft jar.
Non-cosmetic glitter. Craft glitter is the wrong particle type and is not a cosmetic ingredient.
Crayons. They are not formulated or tested as lip or cheek products, no matter how tempting the color range looks.
Food coloring near the eyes. A dye that is acceptable in a cake is not automatically acceptable on the eyelid or lash line.
Essential oils near the eyes. They are concentrated and a common source of irritation, watering, and redness.
Lemon juice. Acid plus facial skin, and sometimes sunlight, is a poor experiment. Juice is also not a sterile cosmetic ingredient.
Baking soda on sensitive facial skin. It is alkaline and can disrupt the skin barrier.
Unknown powders, kitchen spices, and cupboard improvisation. Cinnamon, raw baking cocoa, turmeric, activated charcoal tablets, crushed chalk, and similar ideas appear in unsafe internet recipes.
Contaminated or expired ingredients. Old oils go rancid. Open jars collect dust, steam, and whatever was on the last spoon.
Leftover commercial makeup of unknown age dumped into a new pot. You cannot see what microbes or oxidized oils you just invited in.
Do not try to make mascara, eyeliner, kohl, or anything intended to go on the lash line or into the eye. Those products demand preservation, appropriate film-formers, and a level of microbiological control that home kitchens do not provide. Do not provide yourself a false sense of safety with tea, coffee, or charcoal “mascara.”
Customizing Makeup
Small changes have large effects. That is the fun of DIY and also the reason people ruin a good base by adding five extras at once.
Color
Add pigment in tiny increments. A pinch can move a balm from nearly clear to visibly tinted. Warm pigments pull peach, coral, and brick. Cool pigments pull rose, berry, and mauve. A speck of yellow or brown oxide can correct a pink that looks too blue. Mix pigments as dry powders first when you can, then add them to a melted base so you are not chasing streaks.Texture
More wax makes a firmer stick that survives a warm room. More oil makes a glossier, softer balm that may melt in a pocket. More butter increases cushion and can increase greasiness. More clay or powder base makes a drier, more matte finish and can emphasize dry skin if you overdo it.Opacity
More iron oxide or a higher pigment load increases coverage. More base or oil sheers the color out. Sheer is usually more forgiving on a first blush or lip tint. Heavy opacity shows every mixing error.Shine
Castor oil, a higher oil phase, and more mica increase shine. Kaolin, a higher powder phase, and less oil reduce it. Decide the finish before you keep adding shimmer “just in case.”Fragrance
Skip it for face and eye-area products, especially at first. If you scent a body product, use only a cosmetic-appropriate fragrance at a very low level and patch-test. Fragrance is a common allergen. A peppermint lip balm can also be uncomfortable on chapped lips. Scent does not preserve a product.
Change one variable at a time so you can tell what altered the result. Keep notes. Future you will not remember whether the good peach blush had two scoops of mica or three.
Storage and Shelf Life
Homemade cosmetics usually last less time than commercial ones because they are made in a less controlled environment, often without a validated preservative system, and then opened with fingers.
Oil-based products can last longer than water-based ones if they stay dry and the oils do not oxidize. Water-based products can spoil quickly without an effective preservative. Contamination happens when wet fingers enter a jar, when a lid is left off in a humid bathroom, when tools are reused without washing, when you double-dip after applying product near the mouth, or when leftover product is topped up with a new batch. Topping up is a bad habit. The old layer can contaminate the new one.
Heat speeds up oil rancidity and softens balms into puddles. Light can affect some oils and colorants. Steam from showers adds moisture to powder surfaces and to threads of lids. Sharing a tin moves microbes from one person to another.
Signs a product should be discarded include mold-like spots, a sour or rancid smell, unexpected bubbling, sliminess, a color change that is not just pigment settling, a film on the surface, or irritation on skin that previously tolerated the formula. Looking normal is not proof of safety. Microbes are not always visible.
Do not invent a comforting expiration date and then ignore the product for half a year. Shelf life depends on the formula, whether water is present, how clean the process was, the quality of the starting oils, the container, the climate, and how the product is used. Treat homemade makeup as a short-term personal project, not a six-month inventory and not a gift you make in January for a summer wedding unless you understand the formula’s limits.
Common DIY Makeup Mistakes to Avoid
Poor sanitation is the first mistake because it undermines every recipe after it. A beautiful pigment load will not save a wet, dirty jar.
Incorrect measurements are next. Volume scoops of wax, butter, and powder are inconsistent. A batch that was perfect in winter can slump in summer if the wax percentage was already borderline.
Using non-cosmetic pigments is a safety mistake, not a style choice. Adding too much fragrance or essential oil is how a pleasant balm becomes a rash. Using contaminated containers, including pretty jars that were not fully dry, reintroduces the problem you just washed your bowls to avoid.
Sharing homemade makeup spreads whatever is on one person’s lips or fingers. Making large batches feels efficient until you are six weeks into a jar you no longer trust. Storing products in a hot car, on a sunny windowsill, or open in a steamy bathroom shortens the useful life of even a simple balm.
Other frequent errors: inhaling powder on purpose to “see the color,” using fingers on eye-area products, scraping pigment from old commercial pans into new bases, thinning a formula with water, assuming refrigerator storage makes preservation unnecessary, and keeping a product after it has already caused redness because the rest of the batch “shouldn’t go to waste.”
Beginner DIY Makeup Kit
A practical starter kit can stay small. Buying twenty micas before you have made one successful balm creates clutter and temptation.
Equipment
Digital scale that reads in 0.1 gram increments if you can
Two or three small glass bowls
Silicone spatula and a mini spatula
Measuring spoons
70% isopropyl alcohol
Disposable gloves
Lip balm tubes or tins
A few small jars with tight lids
Labels and a permanent marker
Optional dust mask and a small funnel
Ingredients
Beeswax
Shea butter
Jojoba oil
Castor oil
Vitamin E
Cosmetic-grade lip-safe mica or lip-approved pigment in one or two shades
Face-approved cosmetic mica or iron oxide for blush
Cosmetic kaolin
Fine sugar for lip scrub
Buy the smallest quantities you can reasonably purchase. Unused oils oxidize. Opened powders pick up humidity. A beginner kit is a test kitchen, not a warehouse.
If your budget only allows one color project at first, choose tinted lip balm. It teaches the core skills with a lower number of variables than foundation or eyeshadow.
Professional vs. Homemade Cosmetics
Homemade and professional cosmetics can share a few raw materials and still be different products.
On ingredient control, DIY gives you a short list you chose yourself. That is valuable if you are avoiding a fragrance, you already know you dislike. It is less valuable if you cannot verify impurity limits or batch consistency the way a manufacturer can.
On cost, small batches can be inexpensive after you own tools. They can also become expensive if you buy twelve micas, waste oils, and throw away failed jars. Commercial products include the cost of testing, packaging, shade development, and distribution.
On customization, homemade color play is excellent for a personal lip tint or a one-off cream blush. Professional lines win on foundation matching, mascara performance, and anything that must survive sweat, oil, and eight hours without turning into a science project.
On hygiene and preservation, a careful person can keep a dry balm reasonably clean. A factory is still better at keeping water-based creams from becoming microbial experiments. On testing, a home patch test is not stability testing, challenge testing, or ophthalmological testing. On convenience, opening a compact is faster than melting wax. On regulation, a product you make for yourself is not automatically allowed to be sold, exported, or labeled with medical claims.
The honest comparison is not “pure homemade versus toxic commercial.” It is “short, simple, personal experiment versus product designed to be manufactured, preserved, and used by many people.” Both can exist. They should not be described as the same thing.
Legal and Regulatory Considerations
Cosmetic rules differ by country and they change. In the United States, cosmetics are regulated under federal law. Color additives are a tightly controlled category, and using the wrong colorant can make a product adulterated. Selling a product—not just making one for yourself—can trigger labeling duties, restrictions on what claims you may make, and additional requirements under current cosmetics law. Other regions, including the European Union, have their own notification, safety assessment, responsible-person, and labeling systems.
Claims matter. A homemade tinted balm that is described as treating chapped lips in a drug-like way, whitening skin, or protecting like sunscreen may be treated differently from a simple cosmetic color product. “Natural,” “non-toxic,” and “chemical-free” are marketing language, not a regulatory free pass, and “chemical-free” is not an accurate description of any cosmetic, homemade or otherwise.
If you only make products for your own use, you still owe yourself honest labeling and safe ingredients. If you want to sell, check the current cosmetic regulations, labeling rules, color-additive rules, safety documentation, adverse-event expectations, and business licensing requirements in your country and in every market where the product would be offered. Local zoning and home-business rules can also apply. Do not copy an internet recipe and assume it is legal merchandise. Do not assume that giving products away as party favors removes every responsibility if someone has a reaction.
This article cannot give legal advice for every jurisdiction. The practical instruction is simpler: look up the current rules before you print a brand name and a price.
Frequently Asked Questions
- Is homemade makeup safe?
It can be reasonably low-risk for simple, water-free products made with cosmetic-grade ingredients, clean tools, and a patch test. It is not automatically safe, and it is not equivalent to tested commercial makeup. Safety is a process, not a vibe. - Can I use food coloring in makeup?
Do not use it around the eyes. Even on lips or cheeks, a cosmetic colorant is the better choice because it is intended for that use and sold with that purpose in mind. - Can I make foundation at home?
You can make a simple tinted balm. A wearable, stable liquid foundation with even coverage is much harder and is not a good first project. Shade matching alone defeats many attempts. - How long does homemade makeup last?
It depends on water content, cleanliness, packaging, oil freshness, and storage. Do not assign a generic multi-month date to every recipe. Watch for changes and make small batches. - Can I use mica powder as eyeshadow?
Only if that specific mica is cosmetic-grade and intended for the eye area. Craft mica is not a substitute. If the label does not support eye use, keep it off the lids. - How should homemade makeup be stored?
Cool, dry, closed, labeled, and away from steam and sunlight when possible. Do not treat the bathroom shower shelf as default storage. - Can homemade makeup cause allergies?
Yes. Fragrances, essential oils, botanical powders, bee products, and some colorants are common triggers. Patch-test and stop at the first sign of a reaction. Seek medical care for swelling of the face, trouble breathing, or eye injuries. - Why are preservatives important?
They help control bacteria, yeast, and mold in products that contain water or that become wet during use. Vitamin E, rosemary extract, and refrigeration do not replace that function. - Can I sell homemade cosmetics?
Only if you follow the cosmetic laws where you live and where you sell. Those rules can include labeling, responsible-person duties, restrictions on color additives, safety substantiation, and, in some places, registration or notification. Do not assume a kitchen hobby can be sold as-is. - What is the difference between cosmetic-grade and non-cosmetic ingredients?
Cosmetic-grade ingredients are sold for use on the body and should come with intended-use information. Non-cosmetic versions may differ in purity, particle size, contaminants, and legal status for color additives. - Do I need a preservative in lip balm?
A truly anhydrous balm that stays dry typically relies more on cleanliness and antioxidants than on a water-product preservative. If water or wet fingers regularly enter the product, the risk profile changes. - Can I make makeup for children?
Children’s skin can be more reactive, and eye-area accidents are harder to manage. This guide is not a children’s craft manual. Face paints sold for that purpose are a different category and still require care. - Why did my lip balm get grainy?
Some butters, especially if overheated or cooled slowly in a particular way, can crystallize and feel sandy. Gentle melting and more consistent cooling help, but grainy texture is a quality issue, not a reason to add water. - My blush looks different on my face than in the jar. Is that normal?
Yes. Thickness of application, skin undertone, daylight versus indoor light, and whether the product is cream or powder all change the result. Always check in daylight. - Can I mix homemade makeup with store-bought makeup?
You can wear them in the same routine if both agree with your skin, but scooping commercial product into a homemade jar, or the reverse, creates an untested blend and a contamination path. Keep pans separate.
The most satisfying homemade makeup projects are usually the simplest: a tinted lip balm, a small jar of cream blush, a body oil with a little cosmetic shimmer. Those formulas let you practice sanitation, weighing, and color mixing without taking on water, emulsions, or the eye area.
Begin there. Use cosmetic-grade ingredients only. Measure instead of guessing. Label every container. Patch-test. Keep batches small. Treat the eyes as off-limits unless a pigment is clearly intended for that use. Keep water out of beginner formulas. Remember that a homemade product can be fun and personal without being cleaner, chemical-free, or automatically safer than a well-made commercial cosmetic.
If a recipe requires guesswork around preservation, eye safety, or mystery powders, skip it. If a batch smells wrong, feels wrong, or irritates skin, throw it away. Good DIY makeup is less about inventing a full vanity from pantry leftovers and more about making a few honest, well-handled products you actually understand. Creativity belongs in the shade and the texture. Caution belongs in the ingredients, the jar, and the decision to stop.
The article was synthesized from publicly available cosmetic-safety guidance, regulatory explanations, formulation education, and published research on DIY eye products. These were the main sources used:
Regulatory and official consumer-safety sources
U.S. Food and Drug Administration (FDA), Allergens in Cosmetics
FDA, testing guidance on metals such as arsenic, cadmium, chromium, cobalt, lead, mercury, and nickel in cosmetics
FDA, Small Businesses & Homemade Cosmetics: Fact Sheet
FDA, Summary of Cosmetics Labeling Requirements
FDA, Is It a Cosmetic, a Drug, or Both? (Or Is It Soap?)
FDA guidance on cosmetic facility registration and product listing under current U.S. cosmetics law
Scientific and clinical sources
Analysis of 275 DIY recipes for eye cosmetics and their possible safety issues (PMC) — used for the warning that many published eye-area DIY recipes are imprecise, poorly preserved, and not suitable for periocular use
TFOS review on cosmetics and the ocular surface — used for eye-area caution and ingredient-risk context
Formulation, preservation, and hygiene sources
School of Natural Skincare checklist on making skincare products safe and stable, including the distinction between antioxidants and broad-spectrum preservatives, and the rule that water-containing products need preservation
Formula Botanica guidance on kitchen hygiene and sanitizing equipment before making skincare
CHOICE (Australia) explainer on homemade beauty products, microbial risk in water-based formulas, and why oil-only products are easier to manage at home
Aroma-Zone guidance on good manufacturing practices for homemade cosmetics: sanitation, gloves, labeling, and patch testing
Additional formulation notes that vitamin E is an antioxidant, not a preservative, and that water, aloe, and hydrosols change the contamination risk
Practical recipe and ingredient-technique sources These were used for common beginner methods (tinted balm ratios, mica use, powder blush/highlighter structure), not as proof that a homemade product is equivalent to commercial makeup:
Cosmetic-grade mica tinted lip balm methods and lip-safe colorant notes
Mineral makeup base and powder-blending technique, including dust-mask advice when mixing fine powders
Simple highlighter methods using cosmetic mica in a balm or powder base
School of Natural Skincare overview of mica in homemade color cosmetics
 |  |  |
 |  |  |